Trezor Suite Lite features
Trezor Suite Lite provides a convenient way to keept track of your cryptocurrency portfolio, receive payments and send bitcoin on the go.
Portfolio Tracker
Available to both iOS and Android users, the Portfolio Tracker mode in Trezor Suite Lite shows your balances without having to connect your Trezor. Just sync your coin addresses and you can keep track of your balances wherever you are:
Checking account balances
View your account balances for all natively supported cryptocurrencies, including bitcoin, Ethereum, Litecoin, XRP, and more.
Receiving cryptocurrencies
Use the app to quickly and easily receive cryptocurrency payments. Select the desired coin and scan the QR code (or copy the address) of the account where you wish to receive it.
Manage multiple wallets
If you have multiple Trezor hardware wallets, you can sync and view them all right in the mobile app. You can easily switch between your accounts and view balances and transaction histories.
Connected Trezor device on Android
Send bitcoin
Trezor Suite Lite on Android offers a streamlined Send flow for bitcoin. Read our Send bitcoin in Trezor Suite Lite article to learn more.
Verify receive addresses on the go
Android users can enjoy enhanced functionality of Trezor Suite Lite on their mobile device. With a Trezor connected and unlocked, it is now possible to verify a Receive address without having to go via the Trezor Suite desktop app:
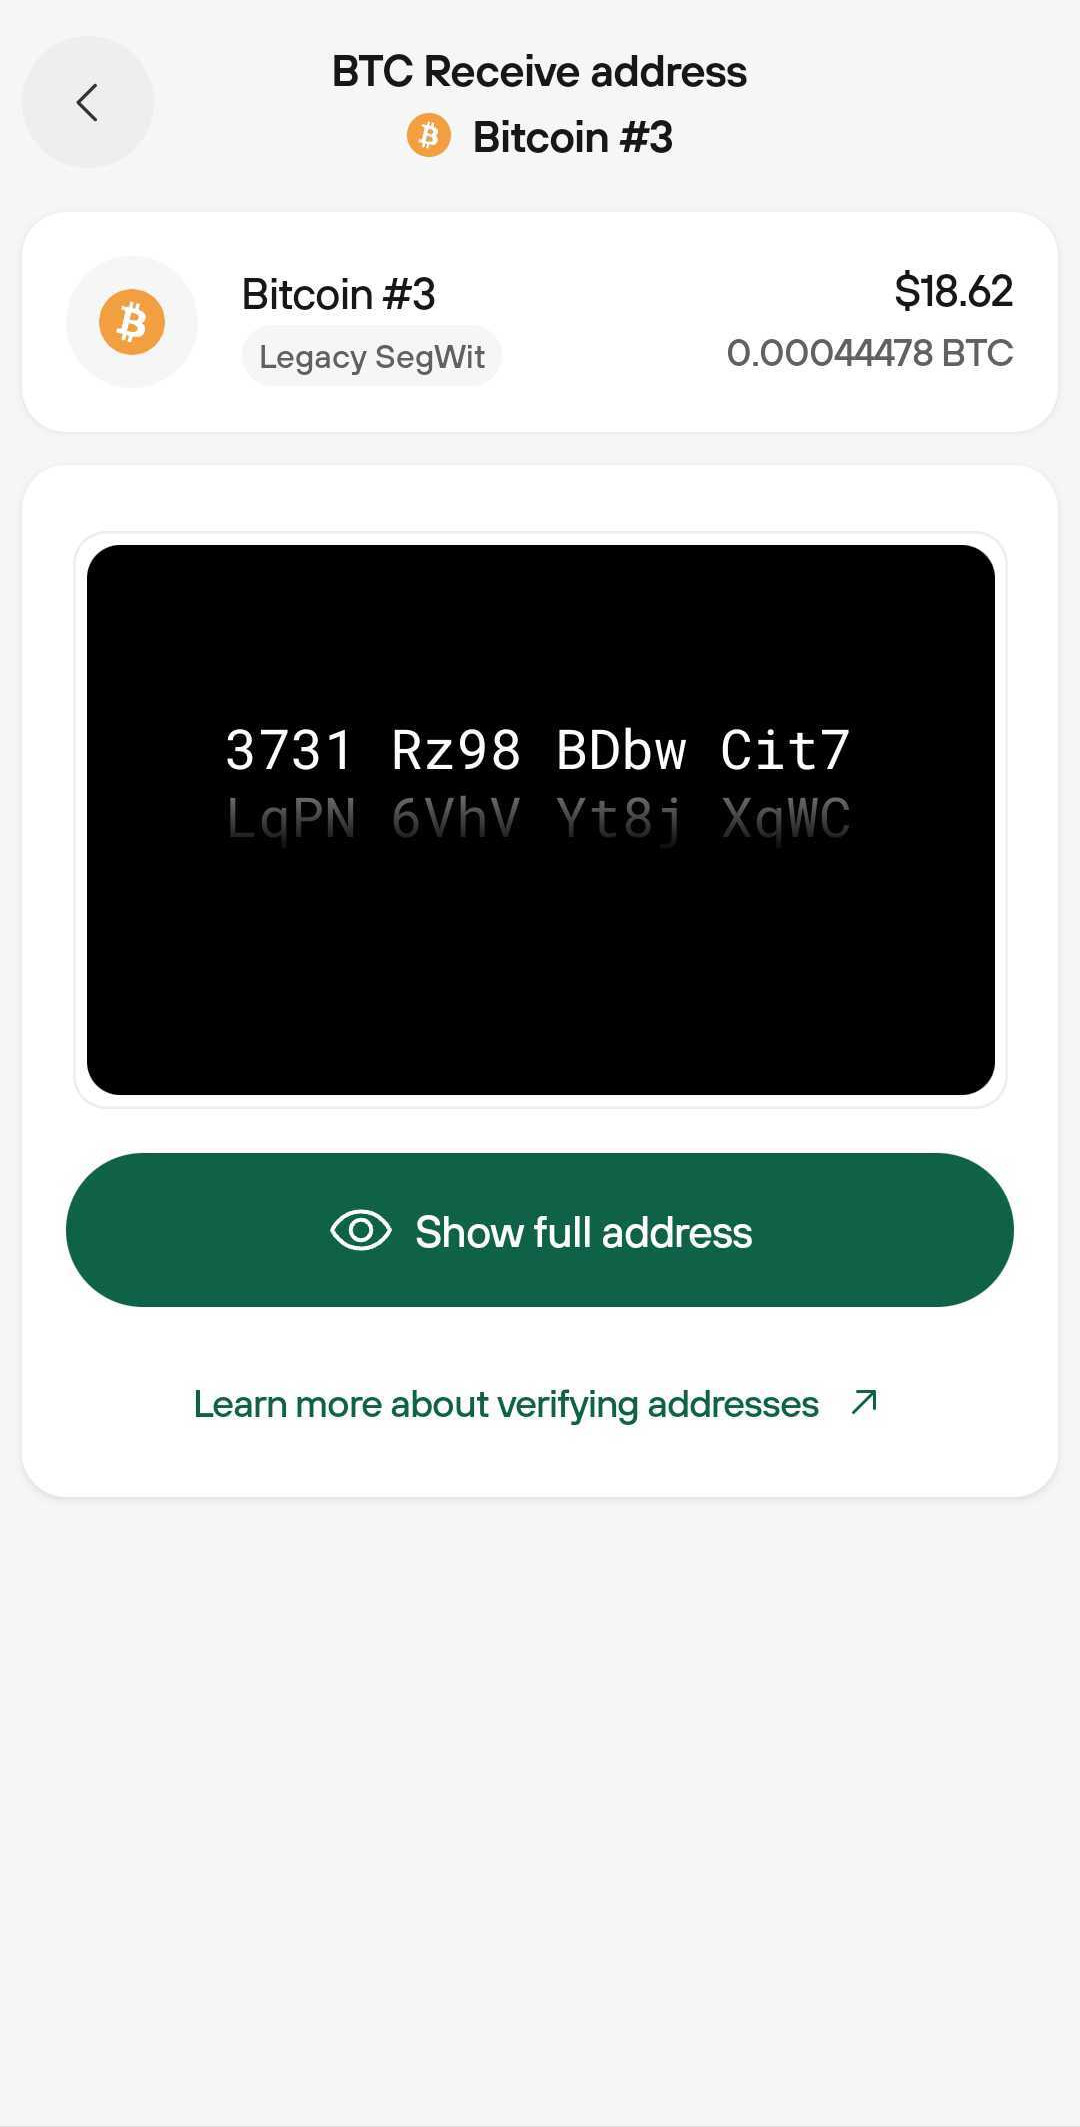
Trezor Suite Lite is designed to work in conjunction with your hardware wallet, allowing you to manage your cryptocurrency on-the-go. With our handy app, you can stay on top of your cryptocurrency holdings no matter where you are.
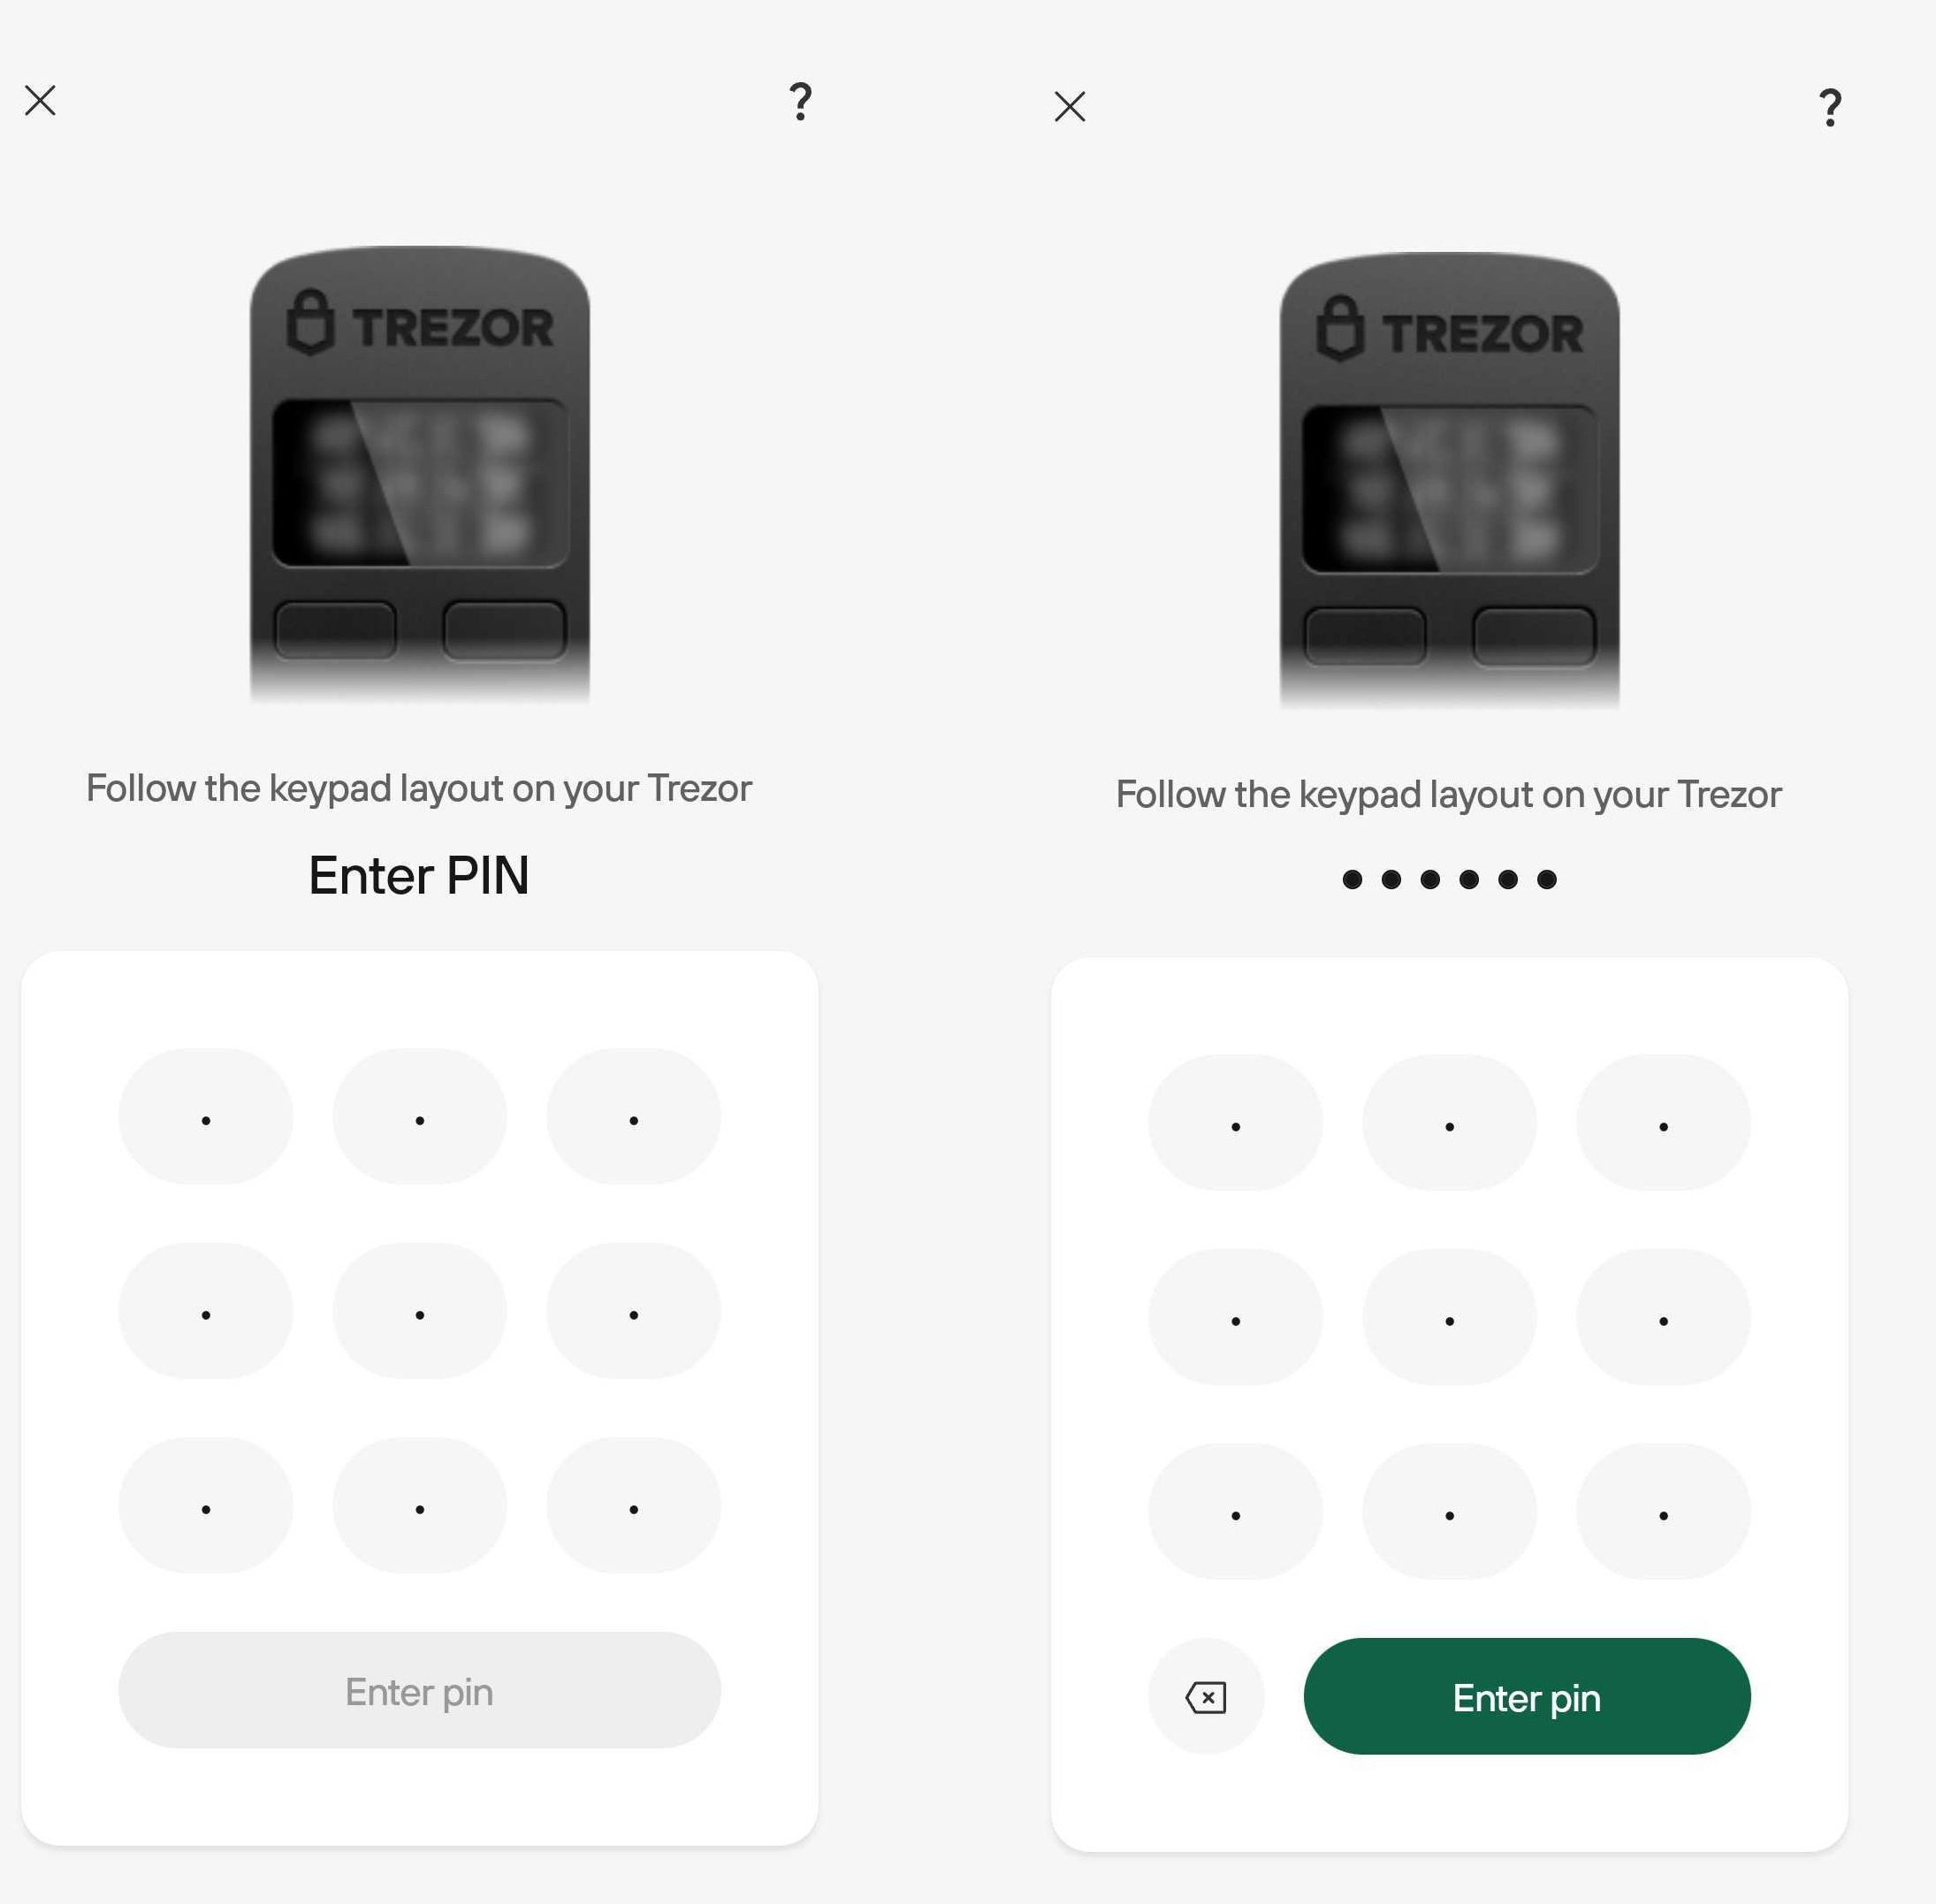
Connect & Unlock Trezor Model One using the app
We’ve made life easier for Trezor Model One users, who can now unlock their Trezor via Suite Lite. Just connect your Model One and follow the on-screen prompts to enter your PIN:
Add new coin / account
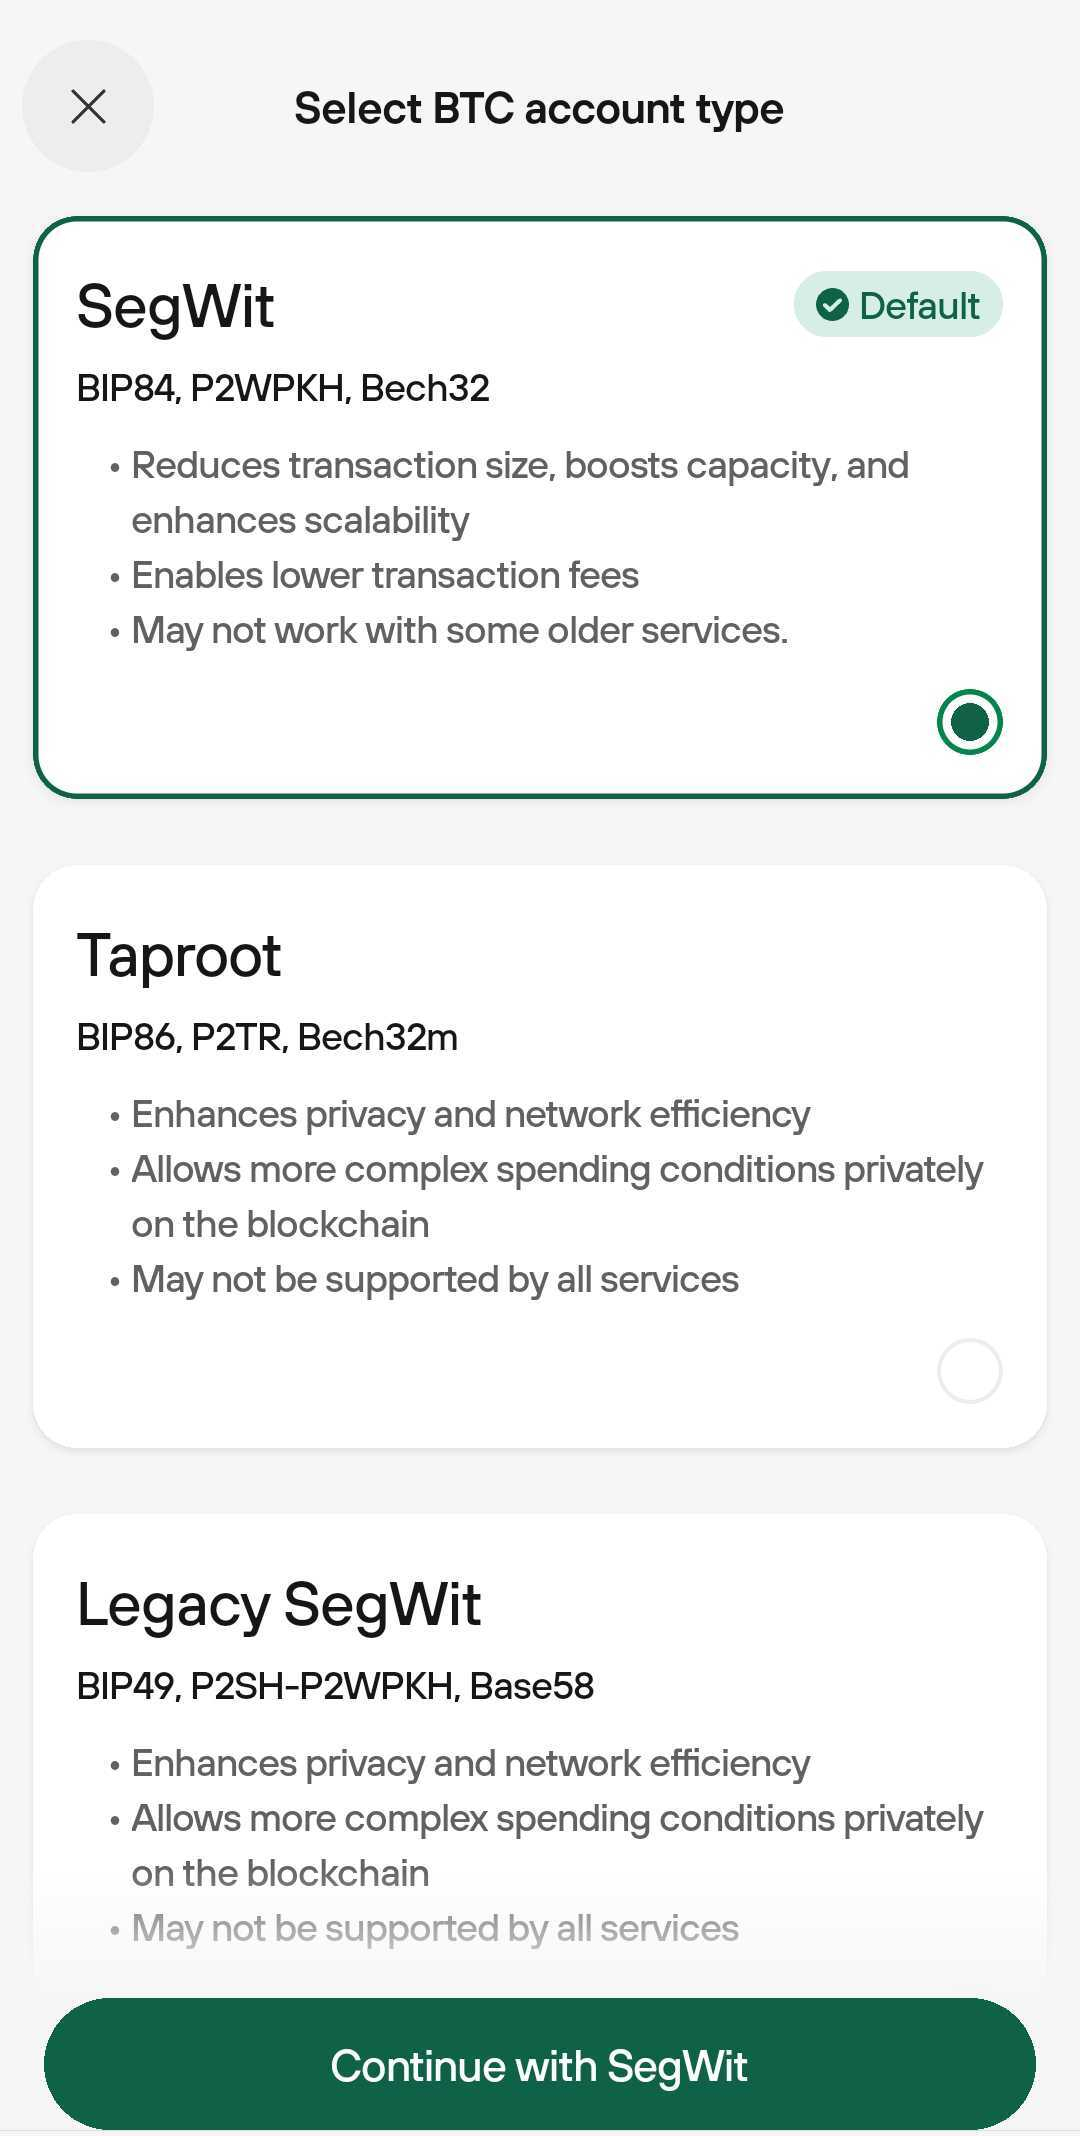
You can easily add brand new coins and accounts for improved asset management on the go. This means you can add a new coin without having to scan the XPUB of an associated account, or add another account type (for certain cryptocurrencies) if you need to separate your accounts for enhanced privacy.- Go to the My assets menu, and press the [+] sign
- Select the cryptocurrency you’d like to add, and select the appropriate address type if necessary, e.g. for Bitcoin you can choose between SegWit (default), Taproot, Legacy SegWit and Legacy:
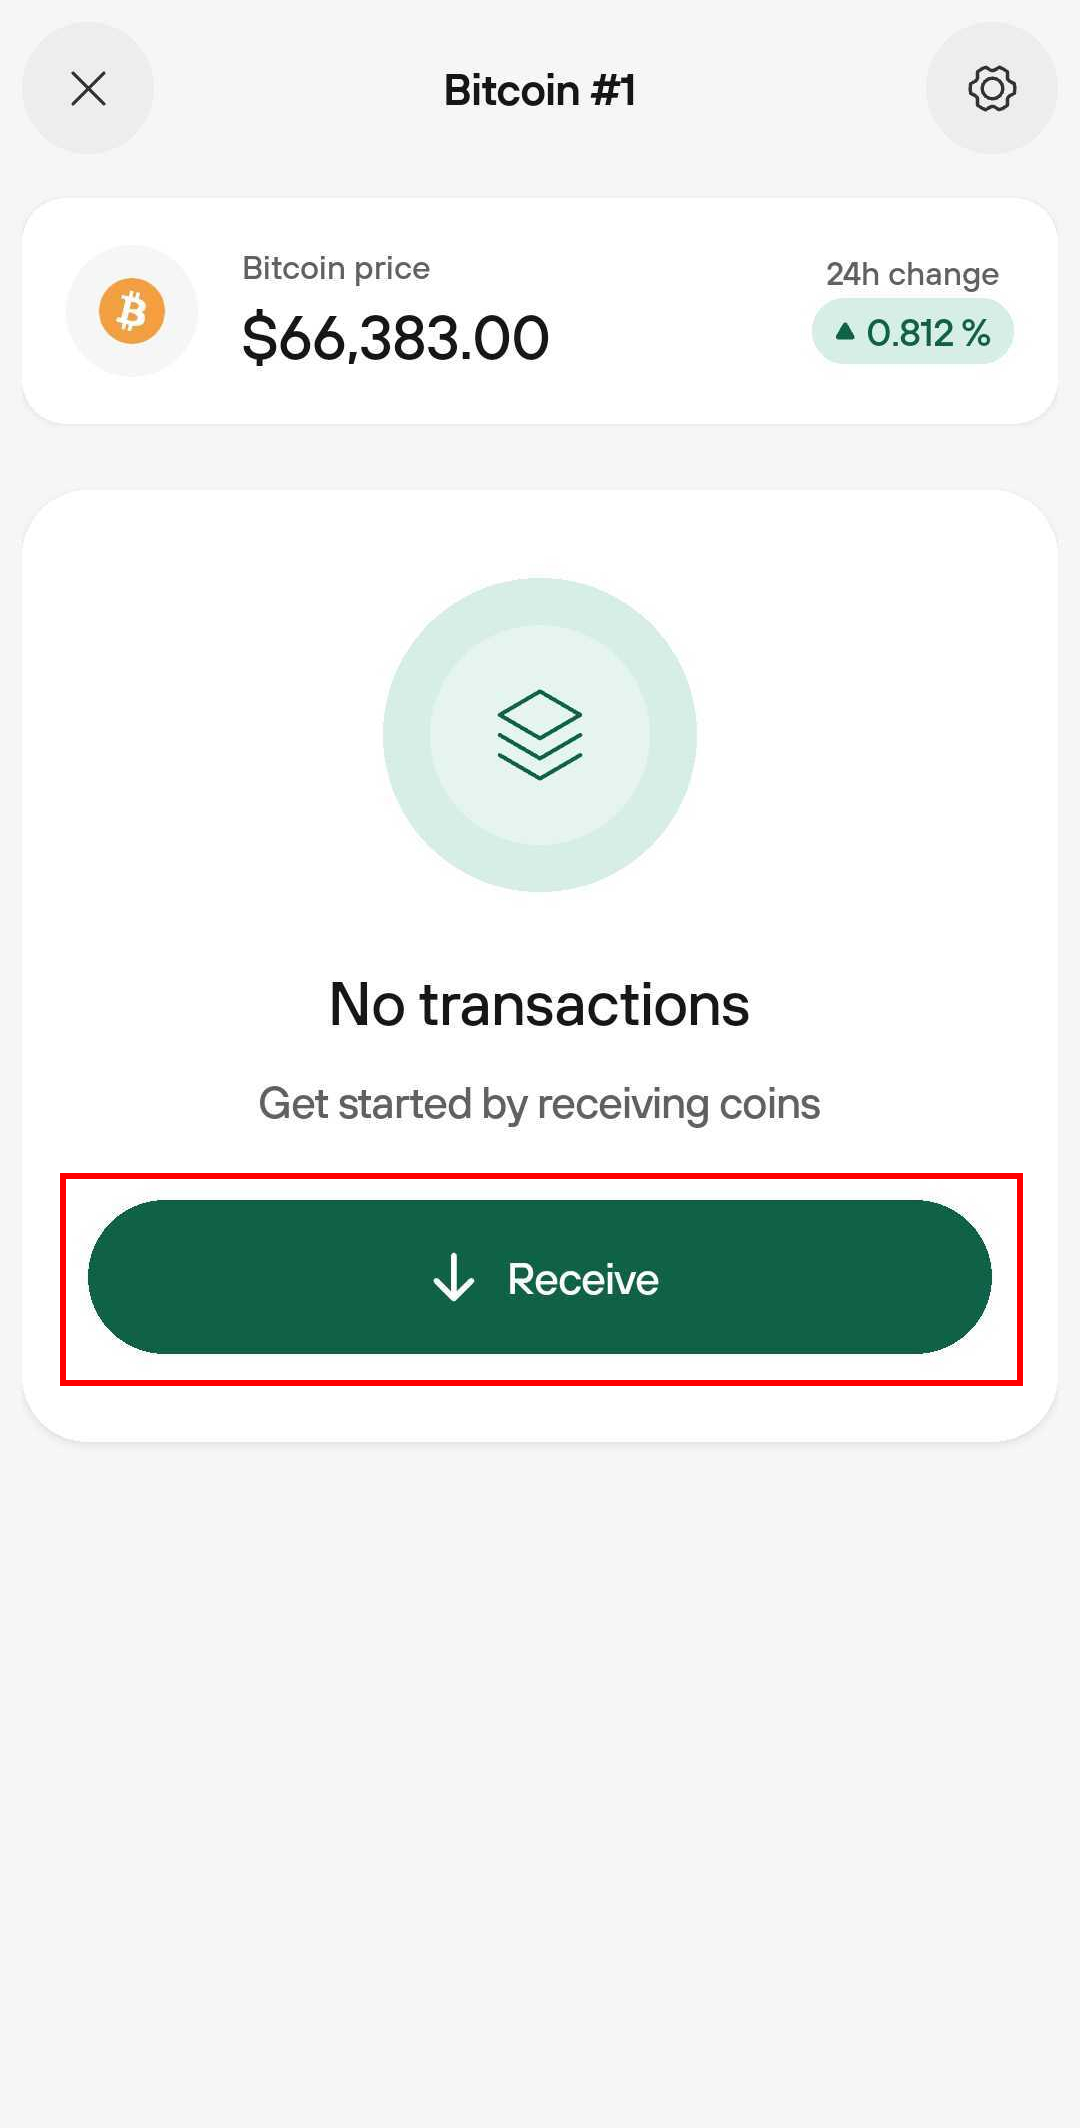
- Once you’ve added the new account, you can hit Receive to generate a fresh address that you can now use to receive funds:
View-only
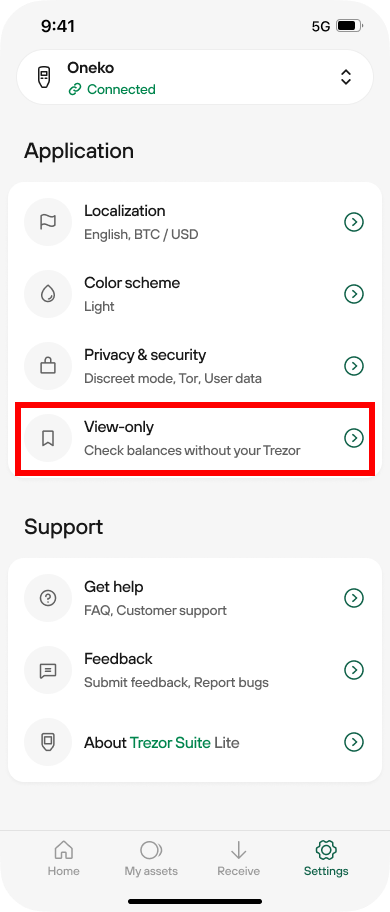
Even when your Trezor device is disconnected, you can still keep track of your balances with View-only. This feature provides peace of mind by allowing you to monitor your funds without compromising security. Plus, no more waiting for retrieving all your assets and balances while connecting your Trezor device!To turn on the feature:
- Go to Application settings and select View-only:
- Then select Enable:
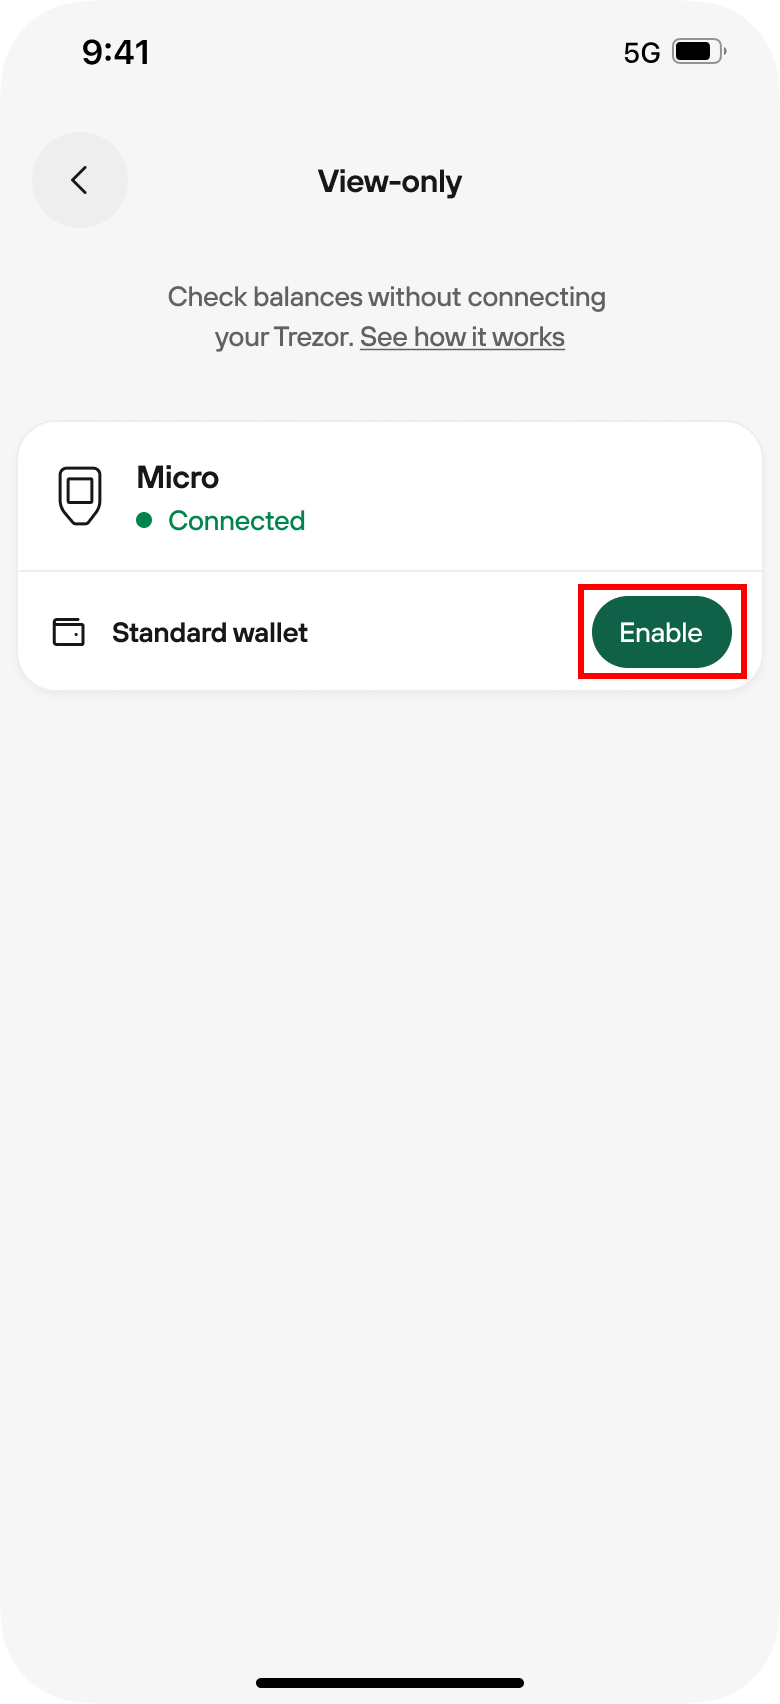
- You can now disconnect your device and your assets remain visible in the application.
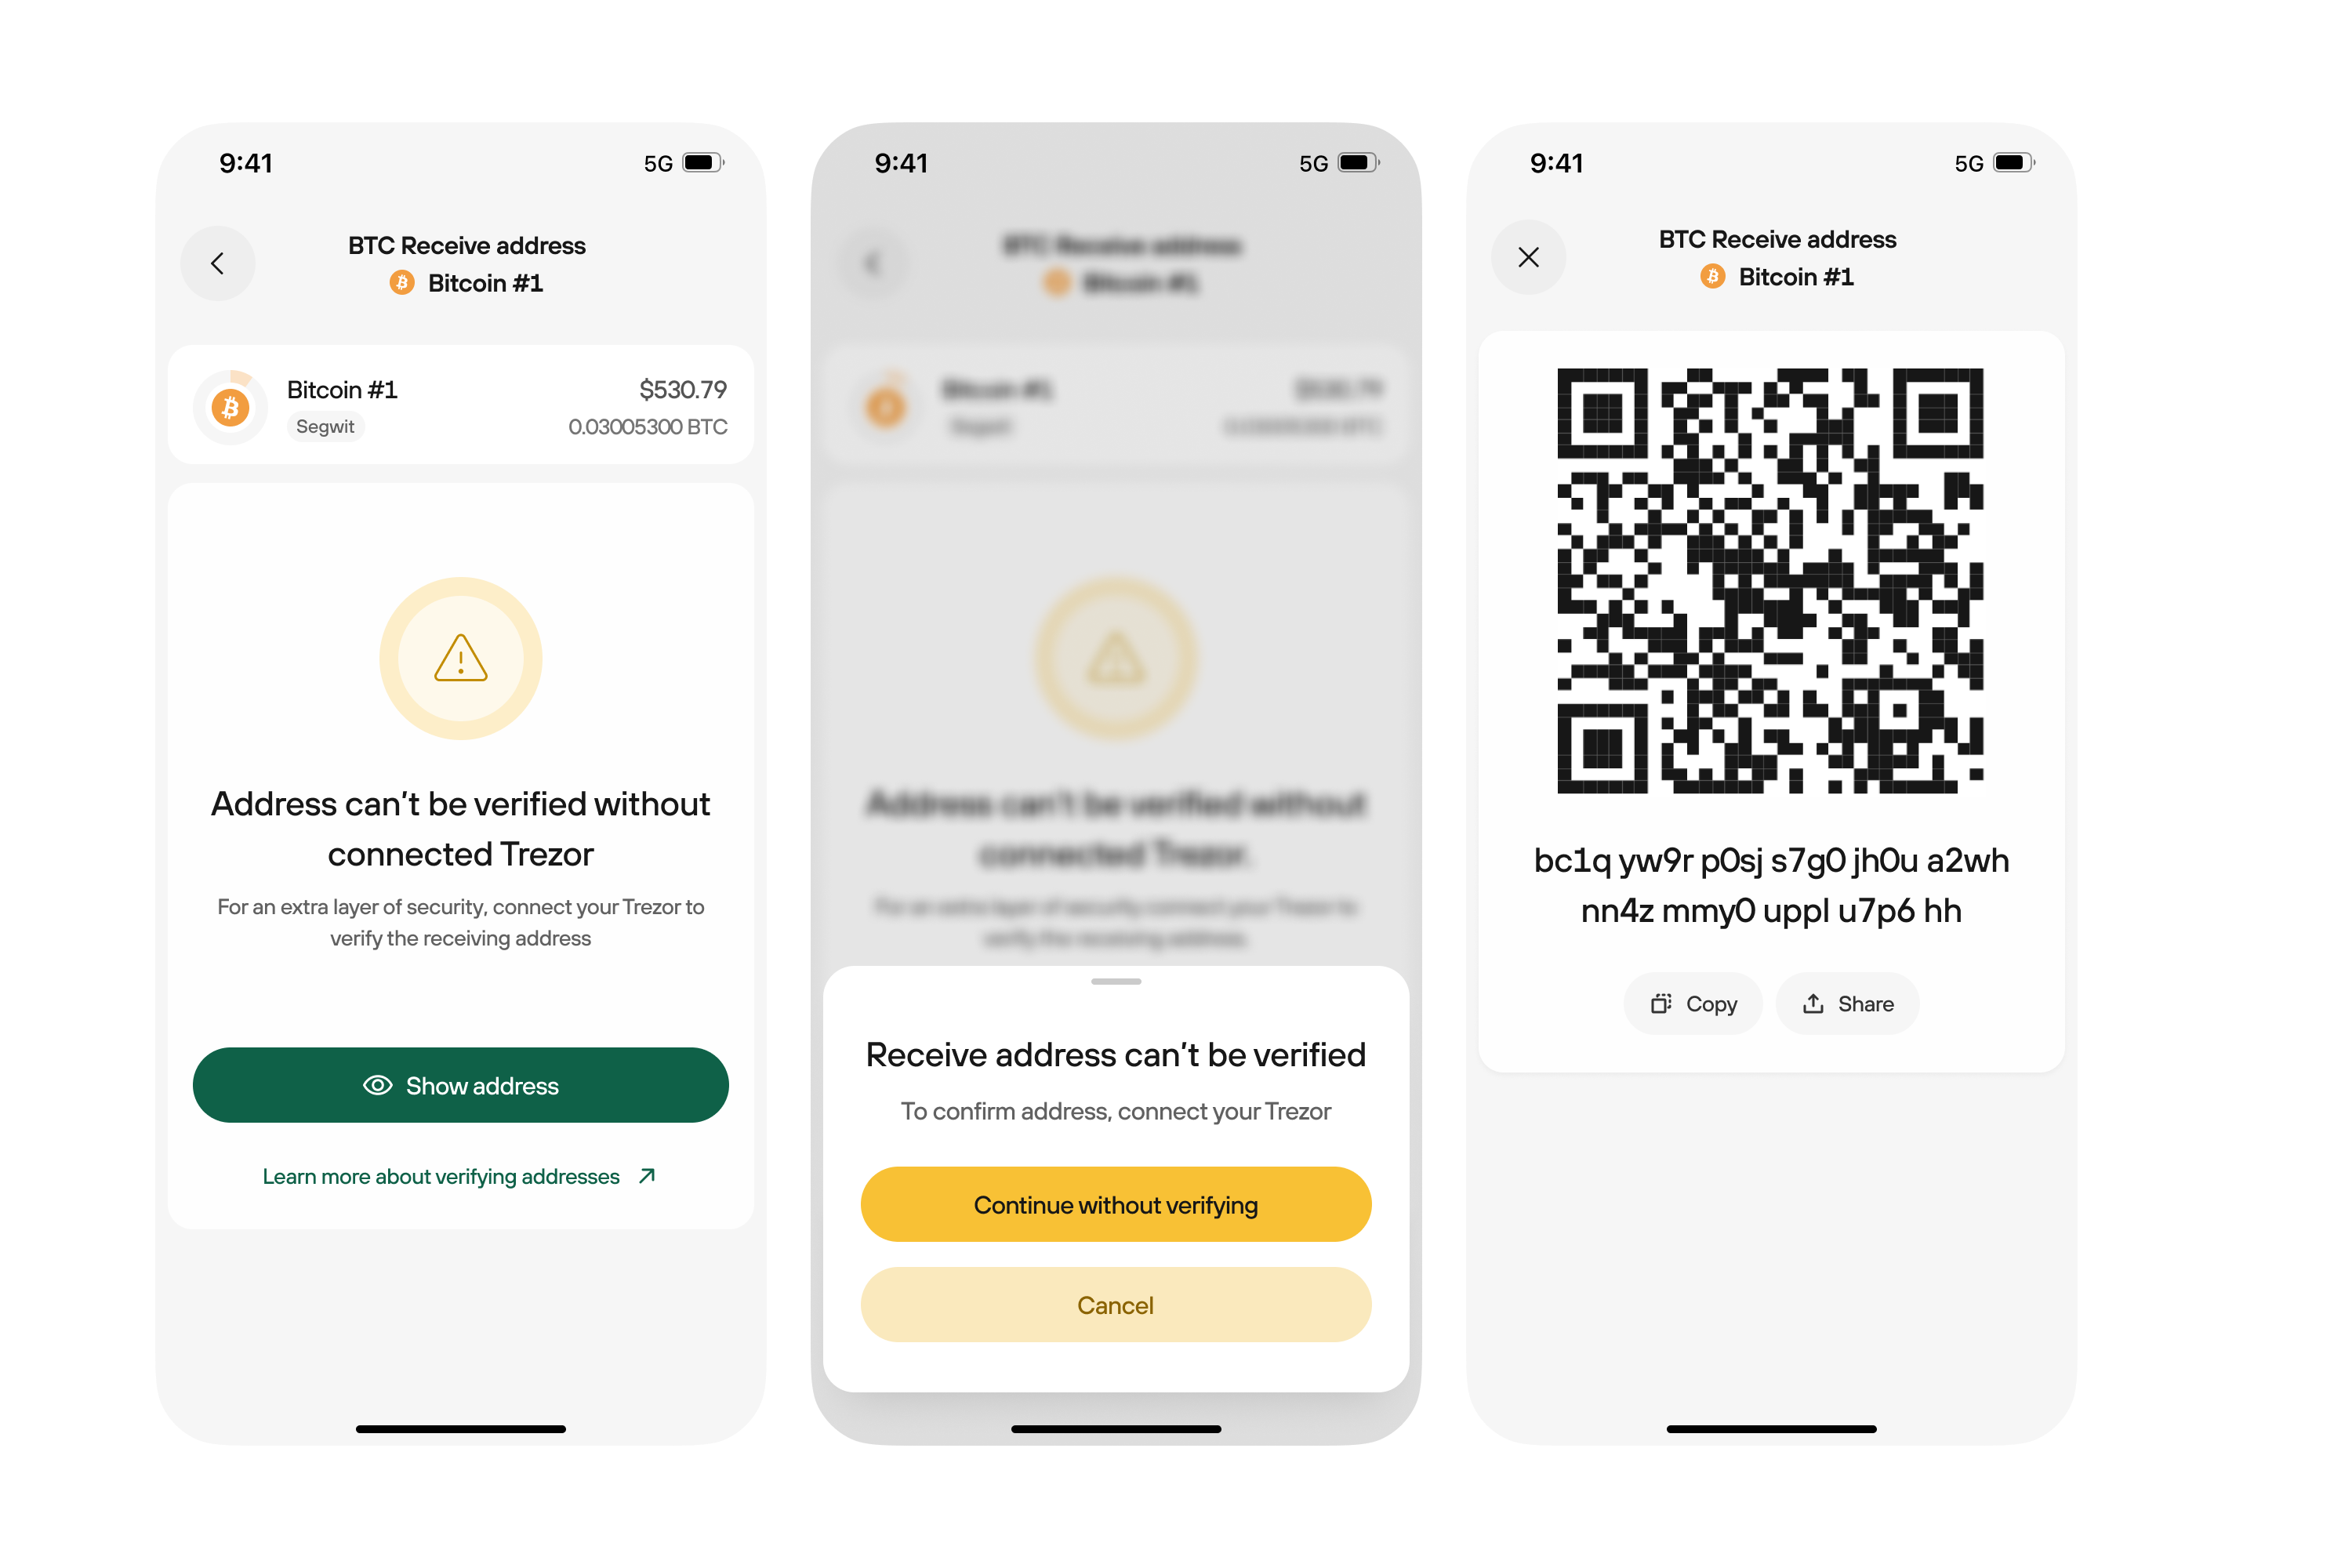
- You can also generate a new receiving address; however, we strongly recommend connecting your Trezor Device to verify the address. Trezor serves as the ultimate source of truth in this regard:
Passphrase wallets
Android users can also load Passphrase wallets in Trezor Suite Lite. Entering a passphrase generates / opens a hidden wallet, enhacing the security of users' funds. Learn more in our Passphrase wallets in Trezor Suite Lite article.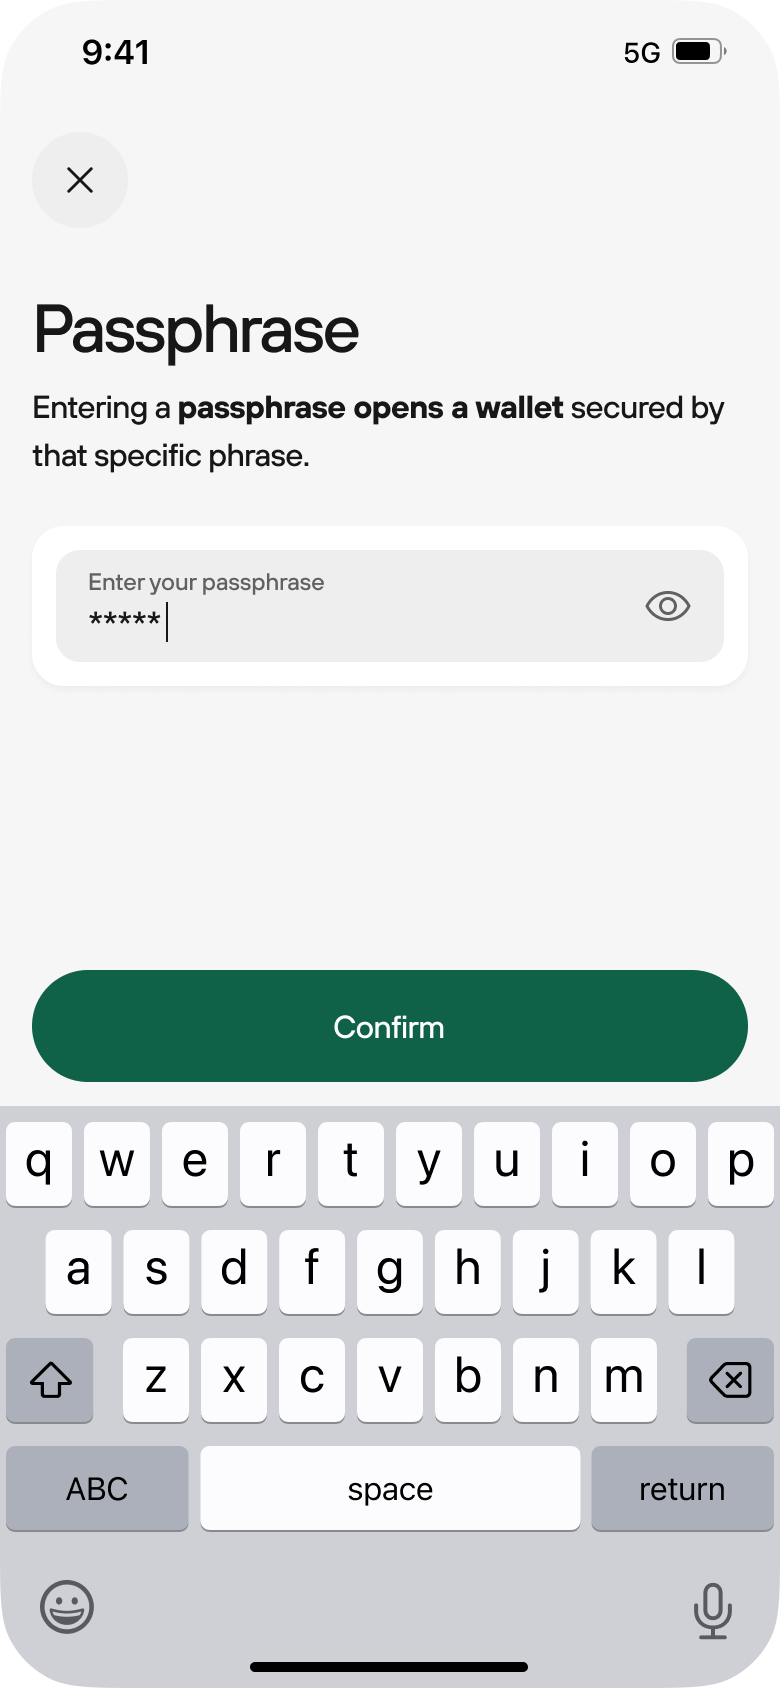
Enabling coins
For a safer and more streamlined user experience, coins can be manually toggled on or off either during the app setup procedure or directly in the application Settings. You can also enable coins during the Receive transaction flow.Enabling coins during device / application setup
- After you’ve connected and unlocked your Trezor hardware wallet, you’ll be given the option of enabling the coins you wish to manage in Trezor Suite Lite.
- Just use the toggle switch on the right hand side to toggle each coin on or off; the example below has Bitcoin enabled (green toggle), with everything else disabled (grey toggle).
- Once you’re happy with your selection, press Confirm selection and you’re all set.
- Remember, you can always change the coin selection via the Settings menu (see next section)

Enabling coins via the Settings menu
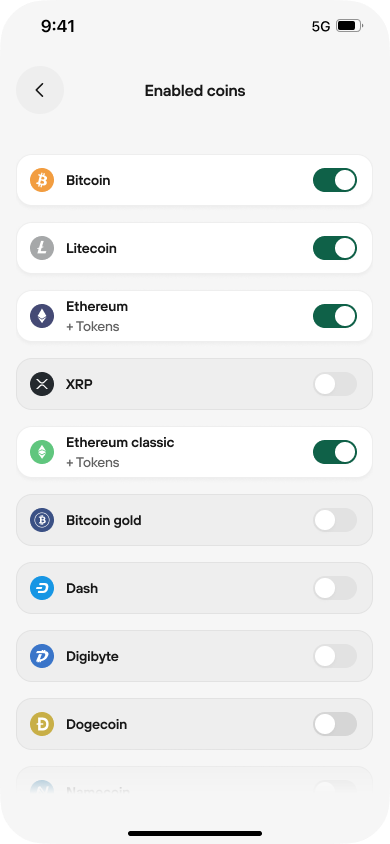
If you’re already using Trezor Suite Lite and wish to change the assets you’ve enabled/disabled, you can do so via application Settings:
- First, tap on Settings in the bottom menu of the application
- The scroll down to the Features section, where you’ll find the Enabled coins option:

- In the Enabled coins menu, you can then toggle on/off the coins of your choice:
Enabling coins during Receive flow
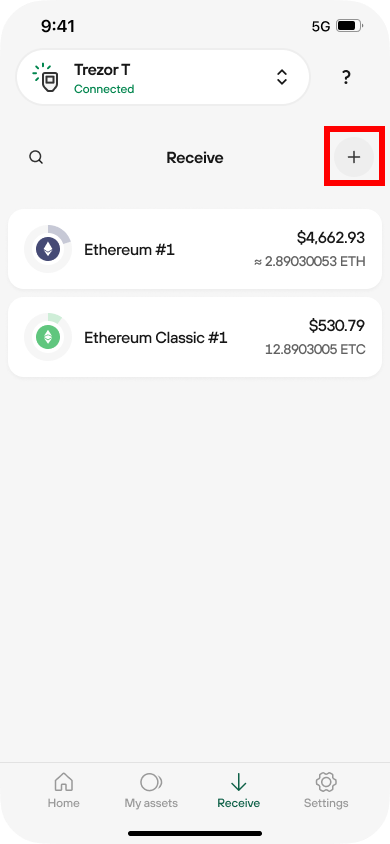
You can also enable a coin during a Receive transaction of a particular asset:- In the Receive window, click the + symbol in the top-right of the screen:
- You’ll then see the Add new menu, where you can enable another supported cryptocurrency:
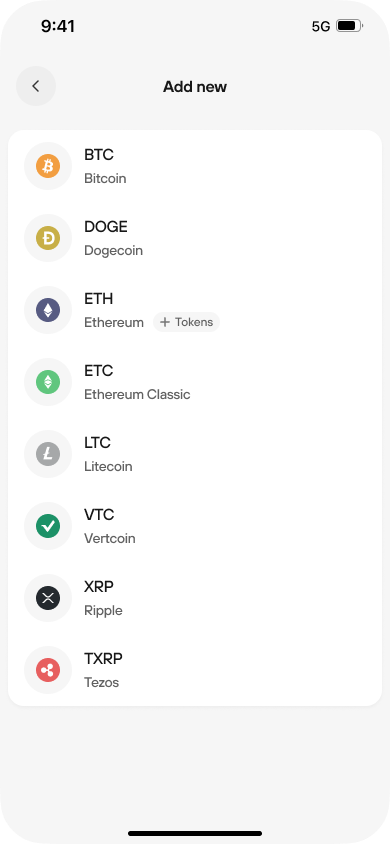
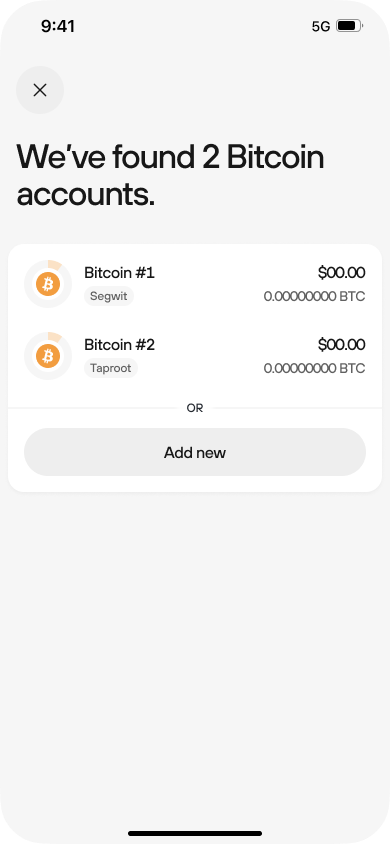
- Select the asset you wish to enable and receive; you can then add either a previously-used account (which will be automatically discovered) or you can add a brand new account.
- For example, if you’ve already set up a SegWit and Taproot bitcoin account on your Trezor, you would see the following options at this stage:
Then continue with the rest of the Receive transaction flow, as prompted by the app and your Trezor hardware wallet.